Even though the wheel wells will be completely covered by the benches, that space is good for storage, so I don't want raw, rough fiberglass exposed under there. Especially since the odd-shaped space can be good for stuffing in an extra blanket. So, I wanted to cover them. Here's what you saw last time, when I laid down the flooring. I was thinking I'd leave that flap that comes up the flat side of each well attached to the floor. But I didn't. We'll get to that in a minute.
You can also see there is a piece of the vinyl laid (not yet glued) across the top of the well. That wasn't quite as simple as it looks.

The inner edge is pretty much straight, but the back edge curves because the wall of the trailer curves inward. So I had to make a template for each of those. And no, they were not the same. And no, they are not symmetric. You must custom fit each side of each one.
I cleaned up the fiberglass as much as possible, and cut down a few burrs that were poking up. There is nothing about this surface that's as smooth as the floor, but I tried to eliminate big pokey bumps.

Then I wasn't sure what kind of adhesive to use. I had some leftover regular vinyl adhesive from a project in the house. But it said it was expired, and more to the point, it said it won't adhere to non-porous surfaces. So, I called Jared, my favorite flooring guy at West Michigan Carpet (it's where I bought the vinyl). He's been in the business 40 years, and has been a friend even longer. He suggested a contact cement, but before an hour had passed, he was knocking on my door, bringing me a bucket of this professional product that I could use the little bit I needed, and return the rest. He said to just brush it on.

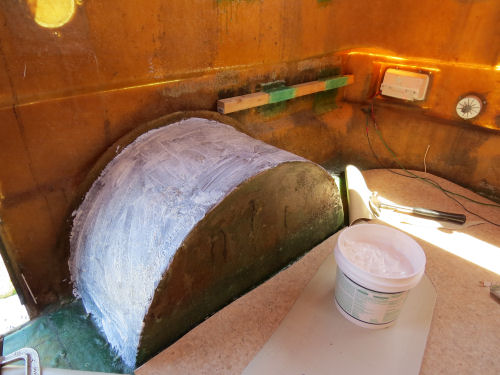
I also showed him my progress to date, and he suggested that I cut the side piece on the wells away from the floor piece, so it doesn't ultimately get stressed and crack anyway. So, I did that. This picture is out of sequence (after it is glued on), but it shows that I just cut them apart. It doesn't matter that there is a little gap. Stay tuned.

So, the adhesive is like soft mud, and it brushed on really easy. I used a disposable brush and just did all of this job in one sequence so I could throw it away when done. Here is the glue, spread on the top of the well. I was able to lay the vinyl on and skootch it around until it fit right where it was supposed to.
This took a few hours to dry. I had also asked Jared about what kind of tape would stick to the vinyl so that I could cover the seams with something to keep out the dirt. The wheel well is too uneven to glue the edges up tight and trim them close like on a counter-top edge. Remember, this will be hidden in a storage compartment. Although I don't want it to look like garbage, it doesn't have to be as finished as something out in plain sight. I told him even duct tape wouldn't stick to it. He chuckled, and said that nothing will stick to the products treated with Scotchguard. The solution- sand the surface down a bit.
This is before I wiped away the sanding residue, just so you can see that I sanded a strip about an inch back on each surface. Then I wiped with a damp cloth and let it dry.

I found a color of "Duck Tape" that goes fairly well with the vinyl. Stretched it slightly to conform to the top curve of the well, and put it in place. Then I started at the bottom edge and made cuts about every inch, folding the front half of the tape down on the face. Then I laid a strip over the seam where it meets the floor.
I think the result is a great solution for keeping the inside of that storage space clean.

I love it that something inside the trailer is finally starting to look nice.
In other news: wrote in the morning, did laundry, and now I'm out the door to a meeting.
 | See More Trailer Flooring |
| if you like this blog, click
| |
1 comment:
Nice to have an expert like that who can give you suggestions. It came out great. That tape is on there perfectly.
Post a Comment