This feels huge!
After I pulled up all the double-stick tape that had been holding the old carpet down, I used a wire brush to take off all the rubber and tape residue

If you look between the discolored stripes where the tape was, you can see how much cleaner the floor is.

Then I stiff-brushed and vacuumed and washed everything. Everything- floor, walls, ceiling. I wanted to get as much as possible of the interior grime removed before I put in the clean flooring. I spare you pictures of scrubbing walls. Take my word for it- I got a lot of dirt off.
Then I had to seal about ten holes that were still in the floor, some about 3/4 inch in diameter. I looked at products in the store and settled on this one called Dynaflex Ultra. It sticks to just about everything, including fiberglass, and supposedly stays flexible. It takes a long time to cure, but that wasn't an issue. I'm not taking the trailer anywhere soon.

My only concern was it said not to use in gaps larger than 1/2 inch, but it seems to be fine in these holes and not pulling away from the sides after 2 days. I also sealed all these, and those larger holes, the ones I fixed earlier in the week, from underneath.

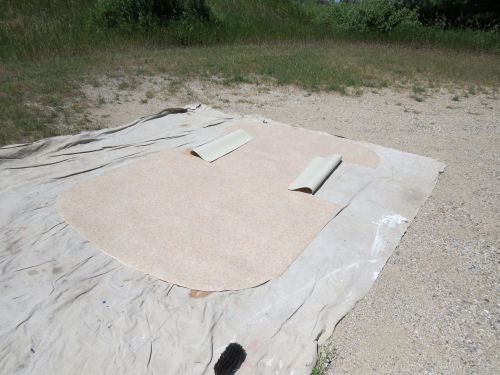
Now for the fun! I laid out a tarp in the driveway to have a large flat clean area, rolled out my vinyl, and used the old carpet for a template.

Traced around it, and cut it out, keeping the flaps that could go up the sides of the wheel wells. I'll also glue a strip across the top of the wheel wells. That will make those storage areas cleaner. It sure gives you a sense of how small the inside of the trailer really is!
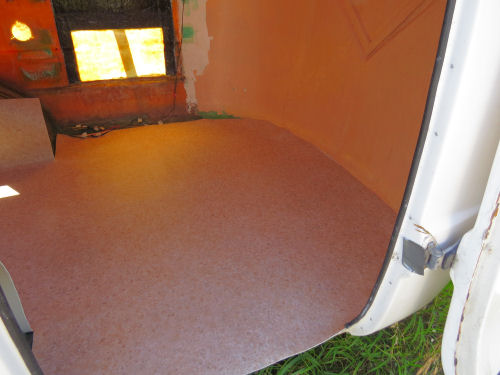
But here it is, laid out on the floor. It's so lovely to have some new, clean piece of this puzzle!

Now I just need to not mess it up by installing something in the wrong place and putting extra holes in it.
Then I also spent a little time beginning to figure out how much insulation and wallboard, etc I need.
In other news: I wrote in the morning, did laundry, and did this all afternoon. I hope to write a couple of news releases yet tonight.
 | See Floor Preparation |
| if you like this blog, click
| |
2 comments:
It looks great, a perfect fit.
This photography tutorial is very attractive. Thanks for sharing with us.
Post a Comment