Entries to Win Afghan

Sign up to receive the Books Leaving Footprints Newsletter. Comes out occasionally. No spam. No list swapping. Just email me! jhyshark@gmail.com Previous gifts include a short story, a poem, and coupons. Add your name, and don't miss out!

Thursday, July 23, 2020

Rollin' in the Sonshine - 2020 Interior Tour

 
Of course, I prettied it up a tiny bit to make the picture look good. We probably won't ever use a tablecloth. Nevertheless, here's the interior view of the trailer looking toward the side that is more complete. If you want to compare how it's improved from last year, follow the link at the end when I gave you the 2019 tour.
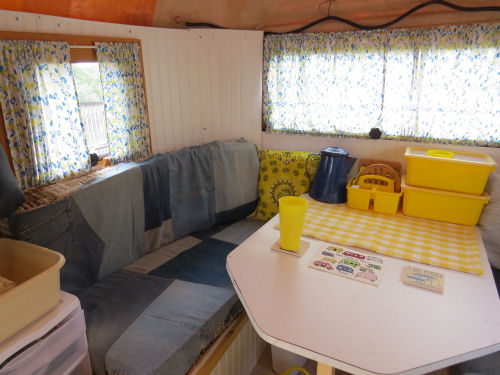
fiberglass trailer interior

Warning- this posts has way too many pictures, but even if you don't care to see them all, I want to document all this stuff I did.

Let's start with some exterior and related items. I actually did this when I put the flooring in. Since it was getting pretty annoying to have to reconnect all the wires every time, I crimped on some connectors instead of just taping the wires. This should be a better connection too. And you can't tell, but after one drawer unit went in, I clipped the wires up off the floor to the back of the unit.

trailer wiring connections

I cut a little depression in a block of wood so that the wheel won't "travel" when the trailer is unhitched.

trailer hitch wheel

I added mud flaps to the car so the back tires don't spit mud and stones on the trailer front (this was actually a surprising mess, and potentially a way to break the front window.) I wasn't sure I could find flaps to fit, locally. But I did. Got the last set the store had!

rear mud flaps

I was SO hoping to improve the exterior looks a bit, but there just wasn't time. I did manage to get a couple of the medium size holes that had been patched filled with Bondo. No progress on the huge rectangle on the other side, but I think this looks better than the raw fiberglass.
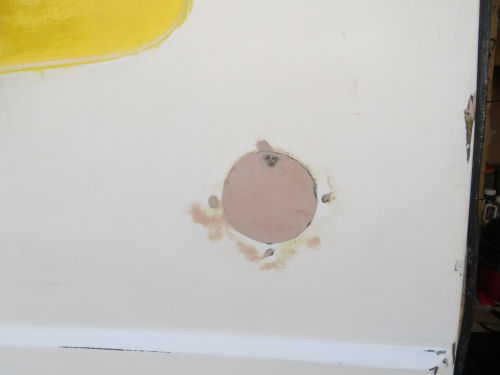
fiberglass trailer bondo application

Now we'll move back inside. Here's the view looking at the left side of the rear half. This is the part of the interior wall I didn't get done. Even so, I think it is a big improvement over last year. I put up some Command hooks where we had some screwed to the braces last year because we used them a lot. However, I think the ones I got might be too small. We'll know pretty soon! And notice the front table leg. It's ready for when my friend, Dick, adapts that bracket that holds the other end to the wall. (The table is just balanced in place to take these pictures!)

fiberglass trailer interior

And here's the view to the kitchen end. There is nothing significantly different here from last year. This knocked-together counter-and-shelves was surprisingly perfect, so until I start doing the real thing, I didn't make changes except to fasten a couple of things together a little better where we discovered that they vibrated loose. Oh. The extension cord is just stuck on that shelf- that's not its home. The bungee cord bandoliers held the drawer closed just fine.

fiberglass trailer interior

Now for some little stuff. I added a strip of velcro to the wall and the back of one of the upright cushions to keep it from continually falling over.

velcro to hold trailer cushion

I know I said I wasn't going to wire the outlets for this year. But, I found the right size and length of cords. I had the boxes and stuff. It was an easy job.

fiberglass trailer electric outlet

Then I was just going to have an extension cord on the other side. But it's so easy to put the box in, and even though that bench front material is the old stuff, the box will be in the same place. So, I just did it.

fiberglass trailer electric outlet

I did not get as far as wiring the outlet for the kitchen end. I don't even know where it will go yet. But I fastened in an outlet strip. Of course, you'd never want to plug in as many things as there are outlets. But, I won't be loaning this out to people who might abuse that. The point is more to have outlets where they are handy so you don't have to booby-trap the interior with extension cords everywhere.
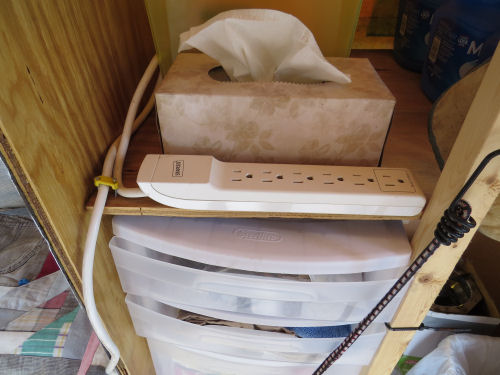
fiberglass trailer electric power strip

And, I think maybe the last of the little interior improvements is that this year I put the vent screen in place. This will have to come back out when I finish the ceiling, and it's a dog to get fastened in place, but it makes the vent more usable.

fiberglass trailer vent screen

I did get the window rollers finished. And I gave the exterior a quickie bath. Of course, the trailer can't travel with all this stuff loose to roll around. It's all stowed and padded and low, with the weight to the front now.

Tomorrow I do the last of the errands: Post Office, Bank, fill the gas, and I'll be on the road! Hope you enjoyed the tour.

See Intermediate Rollin'

Wednesday, July 22, 2020

Is Half a Stink Bug Better than One? Than None?

 
I was fixing the last two window roller arms on the trailer today and saw the oddest insect between the window and frame. Two of them.

half a stink bug

Nifty colors- a deep red and rich gold. The red really stood out. After I got a couple of pictures, I poked it. I thought it was dead, but wasn't absolutely positive. Definitely dead.

I had no idea what this was. Here's a slightly different angle.

half a stink bug

One fell off, but I turned the other one over and got a picture of the top side. Not great focus, but you can see the red and gold on this side too.

half a stink bug

I put it on Bugguide for an ID, because I didn't have a clue what I was looking at, except that it looked insect-y. Haha! It's the front half of a stink bug. Two of them. I think it's a little weird that two of them decided to park themselves upside down between the window and the frame, die, and somehow lose their entire back halves. The colors had me stumped too. I know that stink bugs can be brown as well as green, but I never saw a live one this pretty.

I did find this picture of an alien Brown Marmorated Stink Bug, and I can believe it might be this kind. That shield looks the same shape, and the pattern is similar. I'm betting I picked these up in Kentucky and they hitchhiked home with me. We did have some brown ones in our campsite down there. Hope any eggs didn't survive the winter. I don't want to be guilty of moving invasive pests.

brown marmorated stink bug

In other news: I'm doing the finishing stuff with trailer loading and other packing details. I'm leaving Friday morning. Marie and I each needed an extra day, so it's all good.

Tomorrow I'll give you the trailer tour.

See Bright Green for Spring

Tuesday, July 21, 2020

Ramsdell Theater- the Other View

 
In all the plays I've shared photos of, I can't believe I haven't given you at least a mini-tour of the Ramsdell Theater in Manistee. It's is a gorgeous Victorian era theater, and it's still in the process of being restored, but it's really nice. Some time, I'll have to hunt up other pictures of the building itself, and not just of a play.

Today, I got to see it from the other view- the view from on stage. Even if I don't get to be in a play, I gave my program about the North Country Trail there this morning.

interior of the Ramsdell Theater, Manistee, Michigan

In other news: I ended up with a bad headache in the afternoon, but felt better later on. Made yet another store run. I've about had it with those. Then I started really putting stuff in the trailer, and doing some of the little odds and ends that will make it nicer than last year.

Not sure if I will leave here Thursday or Friday. Marie is in a time crunch of her own, so we are not looking to rush things.

See A Tuneful Christmas Carol

Monday, July 20, 2020

My Trailer Redo - Days 114, 116 - Window Bracket Rollers

 
Today was non-stop. I reassembled the kitchen, took the trailer for a test drive, got the tires checked (they swapped the spare for one that was cracking, but I don't need new ones), cleaned the inside, and started getting it ready and packed to go.

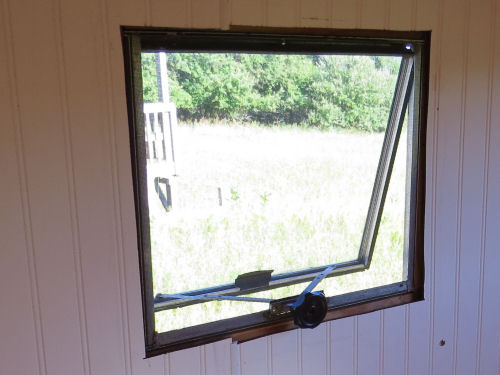
But what I'm going to tell you about is the last of the ISSUES that had to be addressed before it went on the road again. That is the problem with the window bracket rollers. The little flimsy arms that push the window out and close it again when you turn the crank are supposed to have a roller at the end of them that fits in a channel. But the factory installed ones had disintegrated and the part is not designed to be able to replace them after the fact. If you look closely at this picture, you can actually see that the left roller is not in the channel, but is sitting on top of it.

old style crank out trailer window

So, what is the big deal, you ask? The bars will still push the window out, and when you want to close it, jut roll the bars in and go outside and push the window shut. Yes, yes, you can do that. However, then there is nothing holding the window tight into the frame and they just flap on their hinges- their hinges that slide apart. I can just see me driving down the road when the wind is right and the window just taking off on a trip of its own. Not to mention having them flap in a rain storm with wind.

The O rings I had thought were going to work were a perfect size. However, the rubber had too much drag against the channel and they kept bending the arms and popping out. Those were try #2 (#1 was wire gaskets). You can read about the initial problem

Try #3 was nylon washers. I bought the thickness that I thought would fit the channel. Thought I could split them and super glue back around the "hub" at the end of the arm. I could split them, but the ones I bought were too small.

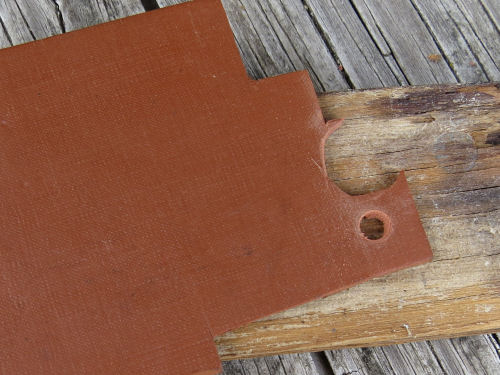
Try #4 happened because of the pegboard project. While I was sorting a bunch of old stuff that was mixed in with the pegboard hooks and other tools, I found a piece of neoprene gasket material. "Hmmm," I thought.

I drilled a 1/4 inch hole in the sheet, the size needed to go on the hub.

hole drilled in neoprene

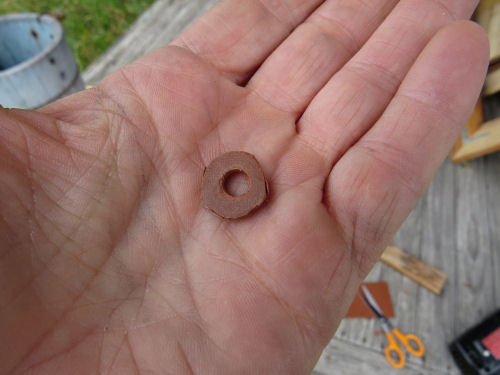
Then I cut out the circle around that. This was perfect. The material was flexible enough to be able to get it over the little flare at the end of the hub, and it was the right thickness for the channel, and it was flexible enough that I could actually get it into the channel.

neoprene washer

The problem was that this particular piece was at least 35 years old. It was also brittle, and if you look in the channel you'll see that one of the two I made promptly broke.

window crank arm channel

No problem! Buy a new sheet of it, right? Well, not at Lowe's. I did look up to see if you can still get little sheets of this, and you can. Some Lowe's even carry it. Not mine. And not only that, the two guys I asked about it didn't even know what it was. The second one was funny. He kept asking me what it was made of, and I kept saying "neoprene- it's a rubber product." He apparently had never heard of it. He suggested sheet metal and then plexiglass. Um, no. Probably need to check an auto parts store, but I'd had enough store fun.

So I went looking in the nylon washer bin again. Found two sizes that looked promising. These are 92 cents a pack. So I got one pack of each.

Try # 5. These ones are the right size. They are flexible enough to get on the hub, although the holes are a little big. However, you can not then force them into the channel. It would be great if the windows were made so that you could slide stuff into one end of the channel, but they aren't.

nylon washers

Try #6. I had one more shot at this without another store run. The other washers were the same size, but they were thinner. They were exactly right for the channel. They are flexible enough to get on the hub and into the channel. However, they are so flexible that they popped right off the hub. But we are getting close! So I backed them with a piece of duct tape.

nylon washer on duct tape

Cut it to fit and popped a hole in the middle.

nylon washer on duct tape

They work! So I have two of the windows fixed, and I'll get one more pack of that size for the other two windows (and maybe a spare). The arms do not pop out of the channels when I close the windows. We'll see how well this lasts. Even if they wear out in a year, I can probably afford $1.84 to replace them.

McGuyver of the trailer window crank arm hub rollers, signing off!

I'll show you what the inside looks like when I'm close to ready to roll. I'm thinking Thursday morning. It's pretty exciting. Even the guys at the tire place loved my little Sunny. They both said "You're doing a really nice job." That feels awesome, because there isn't any way to make it look factory good again, but I think it's coming along.

See Back Wall

Sunday, July 19, 2020

My Trailer Redo - Days 114, 115 - Back Wall

 
Today, I got the back wall as good as it will get for this trip, and began doing some of the little things that are temporary finishing touches. But I'll just show you the wall in this post.

I can't put the old window frame on because the curved wall prevents that wide frame from fitting. I'll figure another way to fasten the curtains for now. That also may help me decide to do something different on the curve. I already have another idea.

interior back wall of a fiberglass trailer

Underneath the paneling, the blocks to fasten the table to are all fiberglassed in, and I cut insulation to fit around them in the spaces where there is depth enough. It's fine that there isn't insulation everywhere. I'm not adding it with any thought of winterizing the trailer. The hope is that it will prevent the condensation which has been a persistent problem with the single-wall fiberglass.

Wonder how I cut that? I made a template from newspaper. Came out pretty good!

insulation on the back wall of a fiberglass trailer

And I cut a scrap of paneling to more of less cover that one extended piece of insulation on the other wall. It will look better, but it will also keep it from flapping when I'm on the road. There is so much torque and whatever as you go over bumps, particularly if not even side-to-side, that there is a lot of stress on everything.

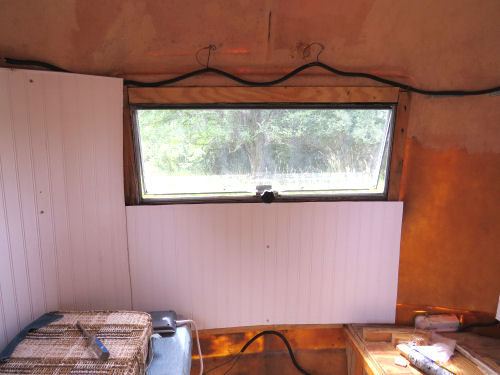
partially finished wall of a fiberglass trailer

More small victories to make the trailer more comfy and usable for this trip. Will show you those another day. I think there is only one more "issue" for me to solve. I couldn't get what I was looking for today, but I got something else to try instead. Stay tuned.

Oh, and I need to have the tires checked. They are pretty old at this point.

See Cushion Fun