OK, in the morning I only have to vacuum and stow the stuff I've spread around to show you the temporary cuteness.
Keep in mind that the walls are still just the bare single-thickness fiberglass. And the cushions have the scratchy plaid covers that are coming apart. Nothing I can do about that for this trip. And the rest is at some level of similarity to the final plan with as much functionality as I could make work right now. I have bought things that I think will work long-term over the course of the planning, and some of them are deployed for this trip.
Here's the view to the bed/table end.

And the view to the kitchen/closet end. You might think that all the effort I put into this front end, when it's all temporary, is extravagant, however, I don't think anything here is wasted. The kitchen counter is the rest of the piece of plywood I pulled out of the barn, and it will become the template for the final counter. OK, I did buy contact paper that won't have a future use, but it makes a decent short term counter top. The supports I fiberglassed in for the counter should be fine to stay where they are.
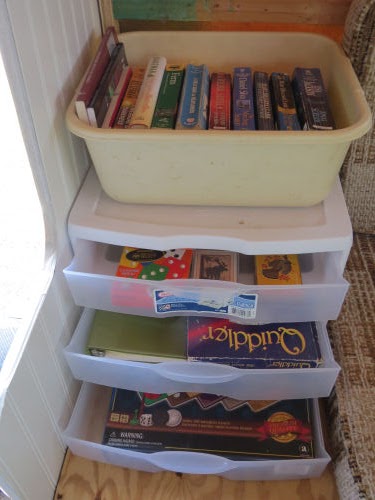
The bracing for the drawer units and shelves are almost certainly reusable, and most of that wood was scrap pulled out of the old trailer anyway. I fastened the drawer units to uprights with zip ties. They seem quite solid. Notice the bungies across the drawers- I'll find out if those will be enough to keep the drawers shut while driving. Again, a bunch of the loose stuff will need to be stowed while on the road, but that's no big deal.

Now for details of some of the temporary things I did. I put 3 Command hooks on the wall by the door. There will ultimately be hooks there, but I don't know what kind or exactly where I want them, so didn't want to make holes.


I drilled a hole through the support for the wires to run along the wall, re-connected them all, covered them with flexible conduit, and fastened them in place where I could. They were always in the way last time we camped, and I wanted to make it less likely we'd be snagging them. Incidentally, I learned that not all brands of 3/8 inch plastic conduit are the same size. Interesting. The cheaper one was too small and very stiff.

I found a cushion and some foam to lengthen the padding on the long bench, and I cut some of the old paneling to cover the gaps in the front so the storage wells are usable.

I fiberglassed in supports for the overhead lights. I know the one over the table is in the right place (temporary camping light on it, but it works great). Hopefully, the one over the kitchen is also in the right place, and after we use it for several weeks we'll have the answer for that!

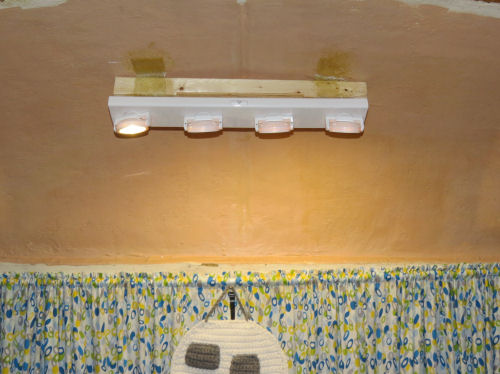
The light fixtures on the supporting walls are permanently attached. They just slip on a bracket, so when I have to remove those walls again to finish the floor they can easily be removed so they won't be damaged. Just by the way, I love these two little lights. They are battery powered, and have a high and low setting. Strong enough to read by or for some gentle light. I think they look way classier than what I paid for them. In the second picture, I tried to show how it lights up the wall.
Also notice more hooks temporarily placed on the brace above the windows. We wanted HOOKS in the spring, and I didn't even have any nails we could pound in. These hooks actually are supposed to go with a project inside the house I haven't finished, but they will be great in the trailer for now.


So, there's your tour!
I have a few more odds and ends to do in the morning, general get-ready-to-leave stuff. I checked the air in the tires and the lights today. I think I'm pretty much ready to go.
 | See Closer to Ready
See Minimal Completion for Spring Use |
| if you like this blog, click
| |
7 comments:
Roll on!
Great purposes for all the parts and pieces you have added. Ingenious! Have a fun and exciting trip.
You've come a long way with this. It's all looking good.
Amazing progress! Have a great trip.
WOW!! you are amazing, Joan! It looks incredible!
Amazing! You 've made great progress in finishing up a usable trailer!
Charlee: "Looks pretty cozy to me!"
Chaplin: "And me! If I were going to travel I would want to be in a nice rolling house like this one."
Lulu: "Oh, are you planning a trip, Chaplin?"
Chaplin: "I said *IF* I were going to travel."
Post a Comment