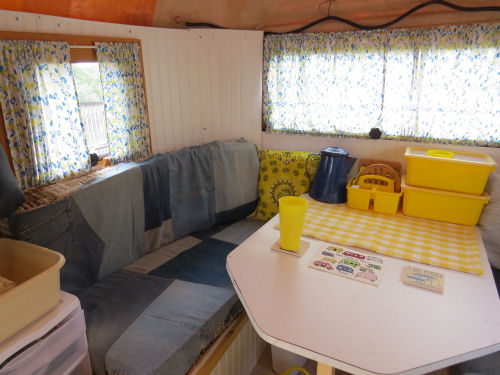
Of course, I prettied it up a tiny bit to make the picture look good. We probably won't ever use a tablecloth. Nevertheless, here's the interior view of the trailer looking toward the side that is more complete. If you want to compare how it's improved from last year, follow the link at the end when I gave you the 2019 tour.
Warning- this posts has way too many pictures, but even if you don't care to see them all, I want to document all this stuff I did.
Let's start with some exterior and related items. I actually did this when I put the flooring in. Since it was getting pretty annoying to have to reconnect all the wires every time, I crimped on some connectors instead of just taping the wires. This should be a better connection too. And you can't tell, but after one drawer unit went in, I clipped the wires up off the floor to the back of the unit.

I cut a little depression in a block of wood so that the wheel won't "travel" when the trailer is unhitched.

I added mud flaps to the car so the back tires don't spit mud and stones on the trailer front (this was actually a surprising mess, and potentially a way to break the front window.) I wasn't sure I could find flaps to fit, locally. But I did. Got the last set the store had!

I was SO hoping to improve the exterior looks a bit, but there just wasn't time. I did manage to get a couple of the medium size holes that had been patched filled with Bondo. No progress on the huge rectangle on the other side, but I think this looks better than the raw fiberglass.

Now we'll move back inside. Here's the view looking at the left side of the rear half. This is the part of the interior wall I didn't get done. Even so, I think it is a big improvement over last year. I put up some Command hooks where we had some screwed to the braces last year because we used them a lot. However, I think the ones I got might be too small. We'll know pretty soon! And notice the front table leg. It's ready for when my friend, Dick, adapts that bracket that holds the other end to the wall. (The table is just balanced in place to take these pictures!)

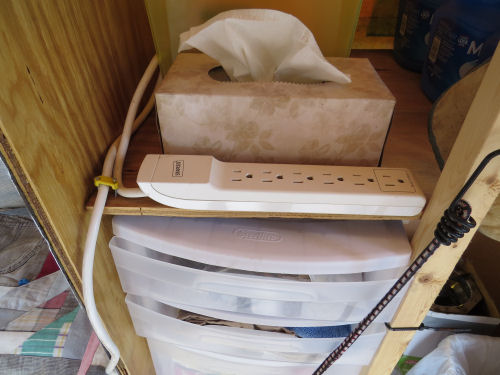
And here's the view to the kitchen end. There is nothing significantly different here from last year. This knocked-together counter-and-shelves was surprisingly perfect, so until I start doing the real thing, I didn't make changes except to fasten a couple of things together a little better where we discovered that they vibrated loose. Oh. The extension cord is just stuck on that shelf- that's not its home. The bungee cord bandoliers held the drawer closed just fine.

Now for some little stuff. I added a strip of velcro to the wall and the back of one of the upright cushions to keep it from continually falling over.

I know I said I wasn't going to wire the outlets for this year. But, I found the right size and length of cords. I had the boxes and stuff. It was an easy job.

Then I was just going to have an extension cord on the other side. But it's so easy to put the box in, and even though that bench front material is the old stuff, the box will be in the same place. So, I just did it.

I did not get as far as wiring the outlet for the kitchen end. I don't even know where it will go yet. But I fastened in an outlet strip. Of course, you'd never want to plug in as many things as there are outlets. But, I won't be loaning this out to people who might abuse that. The point is more to have outlets where they are handy so you don't have to booby-trap the interior with extension cords everywhere.
And, I think maybe the last of the little interior improvements is that this year I put the vent screen in place. This will have to come back out when I finish the ceiling, and it's a dog to get fastened in place, but it makes the vent more usable.

I did get the window rollers finished. And I gave the exterior a quickie bath. Of course, the trailer can't travel with all this stuff loose to roll around. It's all stowed and padded and low, with the weight to the front now.
Tomorrow I do the last of the errands: Post Office, Bank, fill the gas, and I'll be on the road! Hope you enjoyed the tour.
 | See Intermediate Rollin' |
2 comments:
You made a lot of progress this year. It looks great
Wow, so very cute and love the colors. What an accomplishment!! It also looks much bigger inside that what I had imagined it to be. Have a great adventure!!
Post a Comment