The weather is mild this weekend and I decided I might as well get started. Plugged in a small ceramic heater I bought at half price, and it works great to take the chill off. Spent two hours and made minimal headway. I wanted to make videos of the project, and that still could happen, but not today.
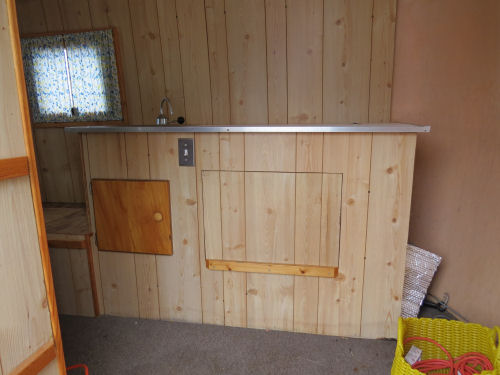
So here's a straight on view of the homemade cabinet that needs to be removed. It doesn't actually look too bad from this angle, but as I said, it's too big, too wide, too heavy, is positioned so that it's very difficult to get into the table seating (even for me and I'm not big), and has sharp corners that tear your clothes.

Step one, remove the counter top. Just four brackets holding it down. Ah... now we can see what we have to deal with. That black thing is a housing for the air conditioner. And the gray blob- wasp nest.

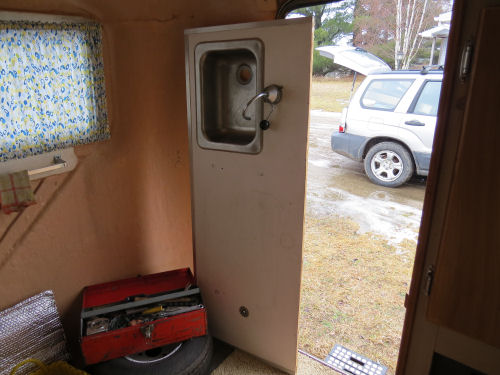
The counter top and sink were easily gotten out of the way. Here is the piece just temporarily hanging out across the way.

Several electrical boxes and outlets were installed in the cabinet. Those were all removed without damage, so they can be reused. One 120V and one 12V plug. Also the air conditioner switch and a couple of other junction boxes.

With the first section of paneling off the wall, I learned that there was some minimal insulation put behind the panels. Wood strips were bonded to the fiberglass to support the panels and to provide a place to fasten the cupboards. The green splotches are the fiberglass patches.

And, guess what? More wasp nests. A really good reason to eliminate the gaps between surfaces.

With the entire cabinet frame removed you can see just how much real estate is occupied by the air conditioner and all its accoutrements. It's gotta go. I'll be addressing the philosophy of my low-tech and low-weight plan in another post.

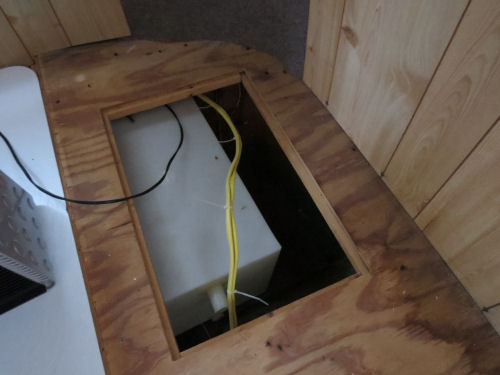
While you are looking at the above photo, please notice the translucent hose coming through the wall and going to the left. That is where you would fill the water tank (pictured below with hose removed) from the outside of the trailer. The tank is located below one of the seats. It's also leaving. Takes up too much room. Don't argue, just wait for my philosophy post. The previous owner never got it attached to the sink, so it hasn't been functional. And the sink drain wasn't hooked up either. All the sink was good for was storage.

Here's the paneling off the entire left wall. There is damp wood on one side of the window, so I'll have to figure out if there is some leakage, or just more condensation. It's causing me to consider new windows. But I really want to keep the cost within my budget. New windows would not only be expensive, but I'd have to do serious fiberglass work to resize the holes. I want to take the trailer to the NCTA Celebration in July, so it has to be at least usable, if not finished, by then.
Pretty ugly, eh?

And the mystery of the day? A 12V wire that goes nowhere.

I'm going to try to get the air conditioner out tomorrow.
Even though it's mild now, I can't be doing things that leave serious openings through the shell in midwinter when wet weather is a given. I have no inside place to work and keep the trailer.
I also opened up the door lock panel and learned that the hole for the latch is not the standard size, so unless I can find one like this one with a key, I'll HAVE to do fiberglass work. Probably will anyway, to close some of those holes- exterior water fill, furnace vent, etc.
It's not much, but it's a start, and I won't know what I'm up against till it's gutted. Then again, any fool can take things apart. We'll see what happens after that!
 | See Index for Trailer Refurbish My Trailer- Assessing the Needs |
| if you like this blog, click | |
3 comments:
It looks like you got quite a good start on things. I wouldn't know the first place to begin with a project like this
I'd call this one a major project . . . or is it projects?
Wow. You are certainly ambitious. But...it's fun to see all of that weird stuff coming out and making room for the new. It is very spacious for a wee camper.
Post a Comment