Entries to Win Afghan

Sign up to receive the Books Leaving Footprints Newsletter. Comes out occasionally. No spam. No list swapping. Just email me! jhyshark@gmail.com Previous gifts include a short story, a poem, and coupons. Add your name, and don't miss out!
Showing posts with label tools. Show all posts

Saturday, November 15, 2025

One Dang Autumn Olive Bites the Dust


Woo hoo! I finished cutting down that one big autumn olive I showed you the few remaining trunks of a few days ago. I raked the area where it had dropped all its leaves and killed any other vegetation.
space where a bush was removed


I cut up the larger trunks for campfire wood. It's not the greatest. It's a soft wood like aspen. But I checked just to be sure it doesn't give off toxic smoke or anything. I wouldn't put it past this noxious plant. But it's ok to burn.
firewood in a wheelbarrow


I treated all those cut stumps with the Tordon. Bright blue was just treated today. I put it on right while the cut is fresh. That blue-ish one on the left was treated a few days ago.
stump treated with Tordon


And what is my magical wand for getting at least this done? I bought a cordless pruner. Took me all summer to look at brands and decide what I wanted. This is Greenworks brand. It was purchased primarily because it's not too big for my hands. So far, I'm happy. The company makes over 100 tools that all take the same battery pack (so the inventory is expandable), and I got this on sale.
Greenworks pruning saw


Now go back and look at the first picture again. See what's behind where this bush was? See what's beside where this bush was? More autumn olive.

In other news, I worked really hard today at necessary tasks- computer, editing, this yard stuff, kitchen cleanup. I hereby pat myself on the back.

See Before It Turns White

Friday, November 5, 2021

My Trailer Redo - Day 176- Two Trim Items

  I actually did the first of these a week ago, but decided to lump the two jobs into one BIG ITEM on my list, so, yeah!!!! I can cross one off today.

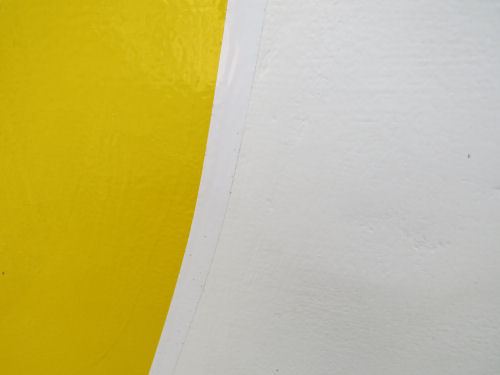
It had to be below 65 degrees to put the striping tape over the place where the yellow and white paint lines meet. It was pretty easy. I did stretch it too much on one of the bumps, so it's not perfect either. Had to cut that and patch it. striping tape on a trailer

Here's one side of the trailer with the tape in place. The paint job was good enough that this wasn't a crucial item, but I had the tape and wanted to do it. You can see inside and tell that I did this before the kitchen area was done. side of a small fiberglass trailer

The other item was more time consuming. I needed to cut a piece of aluminum angle iron to make a new threshold. I don't have tools or skill to do much metal work. However, this was pretty basic. I would like you to notice that little notch at the edge of the door. I did OK with that.

I was determined to finish this today, and finished just as it was getting dark.

So now I can stop being concerned that I'm going to catch the edge of the floor vinyl and rip it. We did have a piece of a pool noodle snuggled over it. That did the job, and made the door seal at the bottom, but it was a total pain. There is still going to be a pool noodle involved in insulation for now because I guess the only solution for the sprung door is to rebuild it. But, the door edge looks tidy again. metal threshold on a trailer door

Biggest headache was that I broke the sabre saw (I guess they call them jig saws now). Our first one lasted 40 years. This one has lasted less than 15. I got a Craftsman. The one that broke was an Hitachi. I never liked it, so my heart isn't broken. Here's my criteria for my purchase... It had the smallest handle. Apparently power tool companies think that small people should not want to build anything. Personally, I think it's not very safe if I can't get my hand around the grip of a power tool. Anyway, I went to the store and got a new one. No sense prolonging the agony... I have to have a saw to get the trailer done.

In other news: I worked on food in the morning and the trailer all afternoon. I'm at the point where I do what I can on any of the remaining projects until I have to let something dry or cure or whatever, and then I find something else I can do. 26 BIG ITEMS to do (36 done), and 33 small ones to do (21 done). 25 days to go.

See Kitchen Walls

Saturday, September 25, 2021

My Trailer Redo - Days 147, 148 - Insulation Experiments

  I finally feel as if I am making some progress, so will show you what I've been working on. I'm trying out my tentative plan to complete the insulation of the trailer in curved areas. If I'm satisfied, then I have to go pick up some more flexible, closed-cell foam. But I have to figure out how much, and what thicknessess.

The area beneath the back window that is also under the table is a good place to fool around with because it won't ever show very much. The table has been removed again so I can work more easily in the space. This is after step 1. I have used various foam insulation types to create a surface that is a lot more smooth than the fiberglass shell that has ridges in various places. The colors of the insulating material don't matter. insulating a fiberglass trailer wall

Just to remind you, this is where the circuit breaker outlet box is mounted. In this picture, without any insulation, you can see that there are various levels of the fiberglass. fiberglass trailer shell with outlet strip

Next, I'll cover all this with another layer of the flexible foam, using as few pieces as possible to make a fairly smooth surface. Then I have to choose what I'm covering the foam with for the finished surface. But that's in the future. I had a couple pieces of the flexible foam that I was willing to sacrifice to this experiment. So far, I'm pleased.

NOTE: a year later, I have learned that none of these adhesives will stick to fiberglass well enough. See The battle of the glues

But let's talk about how I'm sticking the various kinds of foam to the fiberglass. I'll skip talking about all the things I tried (for now) and just say that I'm using Loctite Ultimate. It's going to take more than I'd like (because it costs more), but the Loctite All Purpose, although it did stick to the fiberglass, did not hold up to the vibrations of the moving trailer. More about that another day. So I'm going with the Ultimate. lines of adhesive on foam

But talk about a long process to get to those little lines of adhesive! First let's talk about the caulking gun. Mine is who knows how old. (top one in pic) Something approaching 50 years, probably. While I was watching videos yesterday to try to solve my other problem (coming up next), I listened to a big strong guy say that some of the new adhesives and sealants are so thick that he could barely get them to come out of his gun.

Well! I thought, when I was doing the well pit and roof, that I was just getting wimpy. And the Loctite is so stiff it was really, really hard. It seems there are caulk guns, and then there are caulk guns. OK, so mine was so old it doesn't have a place to cut the tube end, and it doesn't have a wire to pierce the cartidges. I could live with those deficiencies. But you can get a gun that has a lot more leverage. standard ones have about a 6:1 thrust ratio. Just read "how hard you have to squeeze to make stuff come out." I now own one with a 13:1 thrust ratio! (lower one in pic) It no longer takes two hands and a foot to make thick products come out! $17 well spent. caulking guns

And now for the other problem. I could not manage to pierce the cartridge. It seemed as if the nozzle should screw off, but it wouldn't. Could not find a single video about this. You have no idea how long I spent trying to figure out why I could not get that cartridge open. Anyway, I took that cartridge back and got a different one. cartridge of LocTite

Sure enough, the nozzle screws off, and you need to pierce right in the center of that conical projection. If you try to pierce the cartridge and manage to get down beside that cone, the tube will squirt a worm of adhesive off to the side as you use it. cartridge of LocTite

Anyway, now I am in business. I need to try to cover all the curved surfaces with small blocks of foam to create a relatively smooth interior surface. insulation on inside of fiberglass trailer

We won't call this huge progress, but I've finally got the method worked out. insulation on inside of fiberglass trailer

In other news: I edited and formatted all morning. All of the icky stuff and the interior frame I built are out of the freezer. I think one more day to scrub it down and that job will be done. I also am working on the real fix for the curved trailer walls. Stay tuned. My list is up to 56 things to do by 12/1, and I have crossed off 6. TO DO- 50 things: 66 days.

See Day 146- New Tires
See Index to Trailer Refurbish

Tuesday, September 7, 2021

A Day with Elaine

  Today, Marie and I spent the day with my friend Elaine. You can see why we used to be called Mutt and Jeff if you are old enough to remember that cartoon. friends

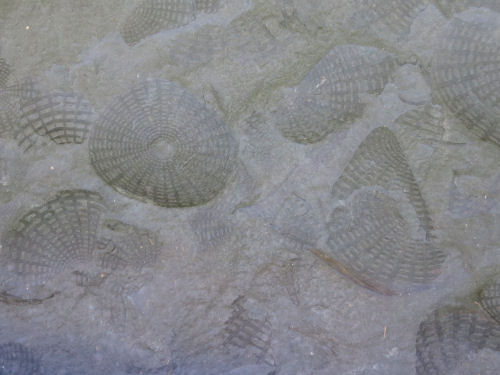
Our first activity was to go fossil hunting for a couple of hours. Around here, that is usually a sure thing to find a few fossils. We didn't find anything spectactular, and I forgot to take pictures because it was just run of the mill stuff. But we had fun. In this stone, there is the round end of a horn coral impression, and the impression of some worm. We also found crinoids and brachiopods, and some other small shell impressions. fossils

"Look over there," Elaine instructed. It's like the grass on the other side of the fence... you always think the best ones will be just around the bend. woman pointing at a stream

Then we went to a small public garden and musuem. It was really nice. Even though it's September, there were still quite a few flowers in bloom. Myer's Gardens

We spent about two hours there, but I would gladly go back again. We didn't really see it all. There is an extensive stamped brick collection. brick collection

There are a number of buildings filled with old tools. One building is a working mill. This is just a small bit of some of the farm tools on display. antique tools

The most amazing thing is a fossil he found on his property. It's been called one of the most significant fossil finds of New York State. You need to understand that each half of this rock is bigger than I am, and is filled with these fossils of Glass Sponges. A fossil colony had never been found before. They are Uphantaenia chemungensis Myer's Gardens glass sponges

Finally, we made a visit to Ithaca Falls. Ithaca Falla

Dinner out and it was time to say goodbye. Nice day.

See Crystal Hills

Wednesday, September 9, 2020

Less Clutter, More Carbs

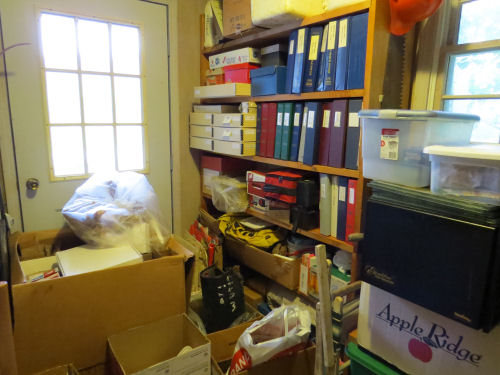
  Remember the pegboard I managed to get hung back in July? Here's what it and that side of the porch look like now. pegboard and shelves You get no "before" picture. But those of you who know me understand that a couple of days ago you could not even get into the space beyond the pegboard. When you move into a house with 1000 fewer square feet, and then add all the stuff from a parent's house, you are in deep trouble. I keep getting rid of boxes of things, but it's never fast enough. Anyway, here is what the porch looks like now. It's basically storage and sorting bins for recycling.

The sorting is not completely done, but I've made a good enough start that it's actually possible to put things away. sorted shelving and storage boxes A much better arrangement of tools and hardware that are commonly used. I also managed to remove piles of stuff that were in the middle of the kitchen. They belonged on these shelves, but I could no longer get to the shelves. I wonder how long this will last. For a while anyway, and that is better than not doing anything at all.

My reward was a batch of hot biscuits. With butter. Too many calories. I don't care. I ate six. biscuits I also wrote a chapter today, did the dishes and made yogurt. Of course, I had started the porch project a couple of days ago, but even so, I think today was pretty productive.
See Umpteen Year Old Task

Sunday, July 5, 2020

My Trailer Redo - Days 95-102 - Letting Water Out

 
Project 2 on my list of 3 is perhaps done. That was to create a way for excess water to get out of the trailer.

I can not take credit for this idea. People who own and try to keep old fiberglass trailers running and functioning have several ways they band together. A man from Iowa, Gary, is in two of the online groups I also belong to. This is his solution to the fact that water will get into the trailer from time to time.

I thought I had mentioned, but can't seem to find it, that after I put in my wonderful vinyl floor, I had to take it all back out because water got underneath it and it got moldy. It was a very discouraging day when I discovered that. So that all had to be cleaned. I wasn't willing to put it back in and have that happen all over again for the trip last fall, not to mention that I would have to put holes in it that weren't going to be the permanent holes. So we used the trailer last year with the old filthy, stinky carpet put back down on the floor.

Time to put holes in the floor! (Yeah, I know... I had recently patched all the holes in the floor.)

First, I had to decide where to put the new holes. Since the inside of the trailer is basically a fiberglass sealed bathtub (there is a fiberglass skin over the 3/4 plywood floor), I leveled the trailer up, sloshed in an inch of water and then swept most of it out until I determined 5 low spots where water pooled. I dried the trailer out and marked those spots. Thought about drilling the holes.

Not so fast! Had to think about whether any of my choices were going to be located beneath bunk walls, or above frame pieces underneath the trailer. Yikes. And nothing is simple. Spent ???, something short of forever, looking for my hole saw set that hasn't been seen in 30 years. Nada. So I had to give in and buy one. (Aside- If there is one thing on my forever wish list, it's an actual place where my tools could be kept and organized. Think I'll ever get that before I die?)

Next public service announcement. If you want to drill holes in anything significant, like 3/4 inch plywood, skip the cheaper hole saw with interchangeable blades, and just get the better saws the first time.

hole saw with hole begun

Anyway. As you can see by the circles marked on the floor, I had to adjust the placing of this hole a bit. Then you drill the larger outer hole, just enough to countersink the edge of the drain cover. And what am I using for a drain cover? At Gary's suggestion, I bought a package of 2.5" soffit drains. They seem perfect. They will let water out and keep mice, etc. out from underneath. Then you drill the 2.25" hole all the way through.

drain hole in a trailer floor

Again, I am using Gary's recommendation for how to hold the drains in place. This is the product I could get locally. It's an automotive adhesive for windshields. Product #8690 is pretty much the same thing, but half the price. Of course, I would have had to order that, and there isn't time to wait for that to arrive. This stuff will really stick! But I now have utmost respect for anyone who can use it and not make a mess.

automotive windshield adhesive


Well, these won't show anyway. They'll be under the flooring. I'll show you the neatest one. I coated the sides of the holes with the adhesive to waterproof them, and then put a bead around the edge and glued the covers in.

floor drain in a trailer

I did think up the next part of this solution myself, but as Gary and I were discussing things, it turns out he did the same thing but with a heavier product. I'm putting a ventilated mat under the vinyl. This is a rug mat, and I'm hopeful it will keep the vinyl lifted just enough that any water can travel to the drains. We'll see, right?

rug matting

I cut it to match the vinyl. I'm not quite ready to put it down on the trailer floor yet. I still have that third project to finish- which is to stop the known leaks. I'm working on them! There are several other things I'd like to get done before Sunny goes on this year's trip, but stopping the leaks has to be accomplished.

rug matting cut to size

Today was very productive. It was just as hot, but the humidity wasn't as bad, and I got outside and got a lot done before it got blazing hot. No yard work done, but I did do a load of laundry.

See Project 1 - Finishing the Structural Walls
See Index to Trailer Refurbish

Saturday, April 6, 2019

My Trailer Redo- Day 64- Paint Prep and Stuff

 
Today was frustrating. I got a great start right after lunch, but as predicted it started to sprinkle about 2:30. So I quit and covered the trailer, and it never rained another drop. I could have gotten a lot more done. Sigh. It's a fair amount of work to get the tarp off and on, so I didn't uncover it again.

Let's talk about this project in general. It has become overwhelming, to the point where I just want to run in terror when I think about the magnitude of the work yet to do. I have to focus on what one or two things I can do next and try to do a good job on those.

I wanted to get everything prepped for the little bit of painting I want to get done before the end of the month, but that didn't happen. Close, but no cigar. One window opening is ready. Every other place is in some state of "not quite."

The four windows are out and stacked. I can start cleaning those up this coming week. I can do that inside while it's raining and snowing again outside...

aluminum travel trailer windows

Every little piece of the puzzle takes research. And, here's one of the really unfortunate results of last year's hard drive demise-- I lost all my bookmarks. You'd think Firefox would keep your bookmarks somewhere in the cloud, but nope. Even my computer lady couldn't get them back. I had literally hundreds of links and videos, all sorted into categories, about how to do all this stuff. Now I'm back to square one. Well, maybe not that far back, since I've learned how to do a lot of things, and I can narrow the new searches a bit based on decisions I've made. But, still, it's not a happy story. Those represented many hours of research.

What I can show you is the pile of stuff I bought last year. So I can't say I did absolutely nothing in 2018. I made some decisions, and bought the paint and some other supplies.

marine paint and painting supplies

Today, I went and bought even more stuff. You know the joke about boats, right? "A boat is a hole in the water into which you pour money." Well, this trailer is ditto, except it's not in the water.

Today, I got more lacquer thinner, more brushes, paper towels, extra fine sandpaper, and the cleaner I've decided to use on the aluminum window frames. That decision alone took several hours of watching videos and asking questions on the fiberglass RV forum.
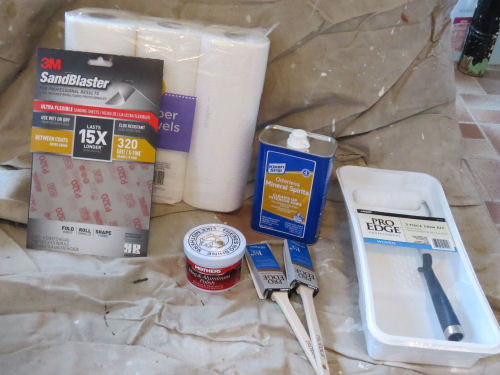
trailer refurbishing supplies

I've added one more thing to my to-do list that I have three weeks to get done. I need to paint along the body seam so I can put the new trim-loc over that crack. Actually, this is good, because I can test the paint on the roof where no one can see my efforts to learn how to put it on properly. There are a lot of dings in the fiberglass that need to be Bondo-ed, but I think none of them are so close to where I'm painting that I'll have to do that right now.

I'm going to keep posting this list from time to time (and probably adding to it as I discover more stuff that has to be done before we can use it!) and the progress in blue, so we can keep me on track!

Paint around all the windows frames so they can reinstalled and properly sealed.
      • Pull out the windows. DONE
      • Repair the wood in two of the frames. Can't do till temperature is above 55 for epoxy repair
      • Replace one of the pieces of wood in one frame. It's in the wrong place and the screws don't even engage it!
      • Strip around the window openings. DONE
      • Clean residue and sand around the window openings. One is 100% ready, other 3 in various stages
      • Clean the window frames.
      • Lubricate the window mechanisms.
      • Decide if I'm going to apply some sort of sealer/coating on the aluminum. DONE- will tell all as I do the windows
      • Paint the primer. Have the paint, but can't do till temperature is above 55 degrees
      • Paint the first topcoat.
      • Paint the second topcoat.
      • Reinstall the windows. Have the butyl sealer tape. Need new screws. Need some kind of strip that I don't even know what to call it yet.
      • Replace one broken window knob. ordered

Paint and install trim-loc on the crack where the halves of the trailer join
      • Clean the residue along this area and sand. in progress
      • Paint the primer.
      • Paint the first topcoat.
      • Paint the second topcoat.
      • Install Trim-Loc. I have this

Reconnect the basic wiring for the lights.

Possibly build in the primary support "beam." I need to assess if it's too flexible to drive without this in. If I do this, I need to pick up the piece of vinyl for the floor which is about 35 miles away from me.

Check the tires.

Clean out the inside mess, so we can at least sleep on the floor.

In other news: worked on my short story, did a couple of errands and made guacamole.


See
Index for Trailer Refurbish
Return to the Trailer Project
if you like this blog, click the +1   or

Like This!

Saturday, September 8, 2018

Boardwalk Repairs

 
You know we've recently had some bad storms that left a mess along the North Country Trail. This week's chapter work outing was already scheduled for the Sterling Marsh Boardwalk to deal with some frost heave and minor repairs.

However, two sections of the boardwalk took direct hits from falling trees. Here's one of them after the tree was cut off.

broken boardwalk

We had a huge group of people turn out to work, close to twenty. This was good because there was a lot to do.

After clearing the first broken section some of the guys made a pile driver with a log and board to smack the heaved sections back down. (They also used car jacks to lift some sections that had sunk.) So the boardwalk is close to level again.

broken boardwalk repairs

Meanwhile, another guy and I went on ahead to start taking apart the broken place pictured above. Other people were unloading and cutting lumber, carrying it and tools to whoever needed it, etc.

Around noon we broke for lunch, and to have the annual chapter meeting. We have done this in the woods before- most notably one under a tarp in the pouring rain- and incidentally while working on first building this same section The Wettest Meeting But today's weather was great.

One of our members, Steve Webster, finally received the national award he was given this spring. It's the "Sweep" award, given to someone who likes to work behind the scenes but is always out there working for the trail.

man receiving award

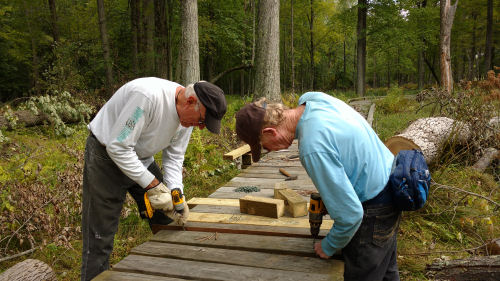
After the meeting, we headed back out to continue working. As bad as that broken section looked, here we are already putting decking boards back in place.

repairing boardwalk

And around 3 pm. we picked up the tools and headed back to the cars. This picture is that same section above that was completely broken up.

repaired boardwalk

Sue and Sophie (with Sophie's sister Anabelle) were there. I hadn't seen Sophie in a long time. This little dog really likes me (and I her)! She kept wanting me to pick her up and hold her all day long. Well, I don't mind that.

woman holding dachshund

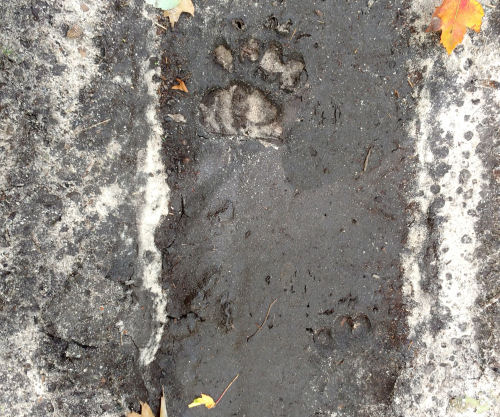
In the roadway that got us back near where we were doing work were bear tracks, but we were making so much noise I'm sure no bear was anywhere nearby.

bear tracks

Great day, amazing accomplishment to get all those repairs done in one work day.

Because of all the walking back and forth, I'm counting 2 more miles toward Hike 100. Total 69 miles.

I didn't do a blog post yesterday. For some reason, after I got home from working at Shagway (extra hours, but it's not like that is difficult), I was so tired I went to bed with a book and it wasn't long before I couldn't even hold the book up. Went to sleep and slept through till 7 am!

One more week till I leave on my hike. Time to get seriously busy!

See Boardwalk Celebration
if you like this blog, click the +1   or

Like This!