
Why am I doing this? Why am I doing this now? The answer to the first question goes back to the philosphy post linked below. I wanted the table to be larger for when I am using this as a writing workspace. The more pertinent question is why now. This was NOT on my radar to do immediately. I was thinking it would be one of the last things... Until I took the old table out to do this year's work.
The old one is pressboard. I knew it wasn't in very good shape, but the truth is that it is coming apart so badly that it would no longer hold the screws for the new table mount that my friend Dick fixed for me last year. Rotten through and through. So this got moved up to NOW.

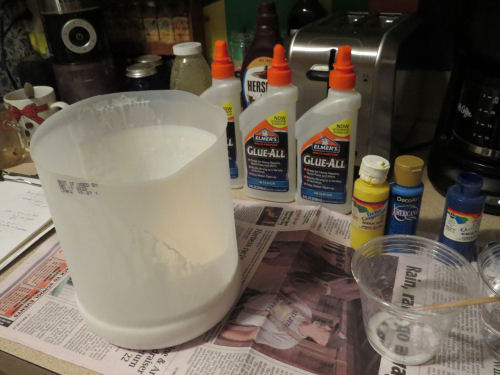
Cutting the new shape was the easy part, and I painted that flat white both sides. Remember I did all those sample acrylic pour boards? That was to try to figure out the mixture that would give me the look I wanted. Had to mix lots of the flow medium (Elmer's glue, water, and then paint) See My first two pours. This is a big project, which is supposed to be really hard to work with, but I never let things like that stop me, right?
Got all the quantities of paint figured out and painted the board again so the surface was wet and slipperier.

Upturned them on the table and then (after this picture) smeared them.

Well, it was hard. The paint ran too much in some places and not much in others. So I laid it down and spread the paint with a stick. That was a "mistake" as I forgot that the way you get really pretty "cells" is where the oil that is mixed in stretches. I got some spots with cells, but not many. The result is pretty, and it's growing on me, but it's not exactly what I was hoping for.

Now we move on to resin... well, after letting that dry for 3 or 4 days. I guess I didn't take pictures of the resin step, but it's pretty straightforward. You mix the two parts and pour it on. It self-levels.
Oops... I guess there were some places where I did not have the oil wiped off the surface well enough. The resin just fled from those spots and would not cover it. It left small bare wells. Yikes! I went and bought more resin. Friend Monica helped me add this second coat making sure that we filled the wells. Better, but the final surface still has some dimples in it. Bummer. Probably a third coat would completely fix it, but I'm not willing to spend the money, and I do not have the time now because this had to cure for 72 hours. It was hard to take pictures of the dimples, but you can see some in front of the reflection of the curtain. (Yes, I did check to be sure you can put resin over an acrylic pour. Nobody mentioned the oil issue.)

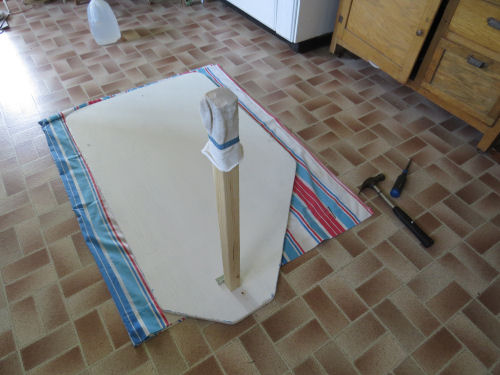
After the 72 hours...is now! Cut a new support of the correct length and hinged it on the table. The sock and rubber band is a temporary scratch prevention for the floor.
Added the hinge bracket that Dick fixed for me. I even remembered how it went together without looking it up.

This is looking down on the surface inside the trailer. I can see that the high-gloss resin may be an issue in sunlight. Sigh. Well, it's pretty anyway.

And bonus! My friend Sue suggested making an extra piece that filled the rest of the bench space so that you could have a wider bed. Easy to make from the rest of the piece out of which I cut the table. Done!

Now it's on to cleaning up the trailer and putting back the kitchen pieces I had to remove to do the wiring.
 | See Beadoard Walls
See Philosophy |
7 comments:
That looks really cool
Wow! That looks great!
Glad I clicked on over here; the photo on fb addled my mind. This clarifies things. Nice work! Safe travels.
That is so cool, Shark! Well done! The added effect of the paint/resin on top of the functionality is a win/win! I hope to see this beauty in person one day.
Hey all you blogger buddies! It's so much fun to have you follow along. Stew- if they ever let us into Canada again, I'd love to meet you.
Lulu: "Ooh! That table reminds me of the ocean!"
Lulu- the inspiration came from a picture of the ocean in Iceland
Post a Comment