Maybe it's done, maybe it's a template for a second attempt. We'll see how it travels. But I got the paneling to fit around the corner.

After I thought I had it figured out how to cut the grooves in the back of the masonite, when I tried that on a wider sheet, it was too flexible. I ended up cutting 63 grooves by hand with a miter saw. I had to move the "fence" that was clamped on for every single cut. Big job.

In between working on that, I fiberglassed a couple more braces to that corner curve so there would the something to fasten the paneling to. The secret to making this work is that although the shell of the trailer is irregular, the interior wall ignores that and just makes a straight curve. Pretty much. The insulation fills behind it, although there are a couple of "high spots" where no insulation will fit. I can live with that.
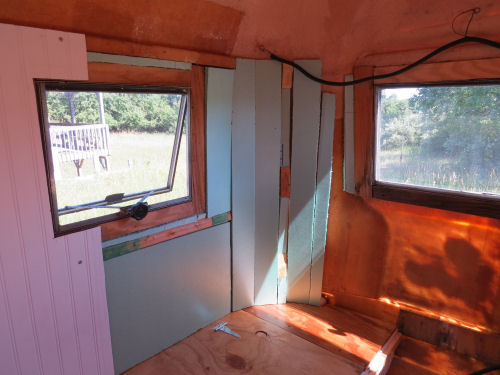
I made a couple of mistakes. One of the cuts got a little deep and the board wants to bend too much there. It may crack while under travel stress. It turned out to be impossible to determine where to cut for the edge of the back window. Even so, this is all right- the edge will be covered by the window frame. But if I end up needing to remake this, I can do better now that I have the shape.
A first attempt at fitting it after making all those hand cuts proved that those cuts were inadequate. However, with the grooves already started it wasn't too awful of a job to deepen them with the oscillating saw. I had to go over every single cut twice more. Long job.

I put some of the trim pieces on the edges and they look nice, although the top moulding won't go around the curve without buckling. I'll have to cut it and do it in a couple of sections. I did not get these panels painted, and that's not going to happen for this trip. They come out easily, so I'll paint them in the next spurt of trailer work.
In other news: I did a load of laundry and played around with hanging tools on my new pegboard.
 | See Starting Interior Walls |
1 comment:
Wow, all those cuts and to have to do them each 3 times. That was a big job. It's looking really nice though
Post a Comment