This is what I've been working on all week, albeit at the pace of an injured snail.
I knew it had to happen, but even so, it's discouraging to take everything out again and be back to the bare fiberglass shell.

There are three structural issues I need to deal with before I can make some actual forward progress.
1. Water is getting into the trailer.
2. Water has no way to get out of the trailer.
3. The structurally important walls need to be completed because I'm hopeful that when they go back in they won't need to come out again.
I'm doing all three simultaneously this week. So the days in the title count will be repeated as I show you about each problem. And hopefully the three solutions.
So, to back up, I thought water was getting in the side window, but it is not. It's pouring in around the back window. I'll cover that issue in another post. But one result was that things got moldy inside. I did not realize when I covered it for the winter that the rug was still wet. So, any wood that was touching the rug or the cushions on the right side did not have a good experience. That included my two brand new walls.
I scrubbed them with Clorox water, and that helped. I ordered a mold stain remover product, and it is excellent. It's called RMR-86. It says it removes the stains in 15 minutes. That was pretty accurate for all except two very bad areas that are near the base of the walls. Repeated applications and drying/bleaching in the sun got all but a little bit out. Of course, I wish this hadn't happened, but it cleaned up better than I had hoped.

Since I hope to not have to remove these walls again, they need to be finished. One of the details this includes was doing a little bit of re-gluing the beadboard to the plywood where it had separated from the months of dampness. Got that done.
Next, I hope to apply an edging strip to the sides that are not against the walls. That doesn't have to happen yet, but those edges need to be flush enough (the plywood and the beadboard) that the edge strip can be attached nicely. Most of the edges were OK, because I cut the two pieces out together. But one edge needed some sanding.

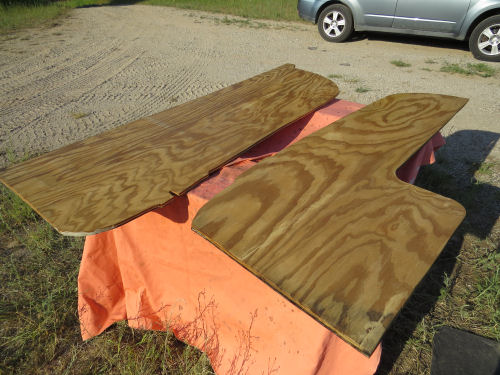
So, let's talk plywood. When I bought this, I asked for "good one side" plywood. They guy looked at me like I had two heads, and let me look over the sheets until I found a couple I liked. What I didn't realize until later is that if I'd gone to a real lumber yard instead of a box store, I could have gotten it. I was willing to pay the extra for one sheet of higher quality plywood. But I guess the box stores don't carry it. I know it exists. The upshot of this is that even when sanded, this wood isn't great. But, it's going to have to be fine.
When I started sanding the surface, I was getting some splinters in one place. Our plastic wood was too old, so I had to go back to the store. I thought I was being frugal to find such a little container. Ha! Call this a public service announcement. Don't get this kind unless it's really what you want (like to fill dents in a finished piece or countersunk nail heads). It does say "non-hardening" right there. But I did not know this product existed, so that didn't register with me. I applied it and then went inside to get a magnifying glass to read the fine print and learn how long until I could sand it. What? "Does not harden and cannot be sanded." It comes in a variety of colors and you are supposed to use it on already finished wood.

Too late. It was already in place. Can you see where?

Sanded some more. It did OK. I have now put on two coats of exterior grade polyurethane. One to go. Yes you can see where I put this wood putty. Is it totally horrible? No. Am I going to change it? No. Somewhere between the beautiful dream in my head and the potentially botched job this trailer could be is the reality I'm going to have to live with.
There is one more coat of poly-u to put on tomorrow. Finally made some progress on task #3. Tomorrow, I think I'll talk about task #2.
In other news: This trying to work in the morning before it hits 85 degrees is not going so well. My brain just doesn't like it, which has resulted in an all-day headache on two of the four days I've tried it. But I'm going to keep trying. Actual time spent working? Who knows. Not much compared to what one would need to do at a real job. But I'm doing what I can in the heat. I also popped 15 more autumn olive out of the yard. I can do about 5 at a go before needing to cool down again.
I've totally trashed the house. I'm really good at that.
 | See Index for Fiberglass Trailer Refurbish |
2 comments:
That would be discouraging having to pull everything back out. Good thing you have the ability to do all this work yourself. You are definitelyl multi talented.
Sure is looking good.
Post a Comment