I may have licked the leaks!
You might recall that I sat in the trailer one night this spring in a torrential storm and watched
1. water pour in beside the rear window.
2. It was also still seeping in under the large hole where the air conditioner was.
3. The roof vent was leaking, which had never, ever happened before.
Let's talk about #2 first.
Every day, I've been putting another piece of fiberglass on the inside of the trailer to try to stop that seepy leak. On Thursday, I turned the hose on the area on the outside, and WHOA! big leak. What the heck? So I dried it all off, fooled around with pressing a wet sponge on smaller areas to try to isolate the leak, looking things over, and much to my chagrin, discovered something I knew, but had forgotten about. When I removed that big honkin' air conditioner frame, I had cut through the trailer skin below that little bump, where you can't easily see it. Ouch. Well, that explains the leak, you think?

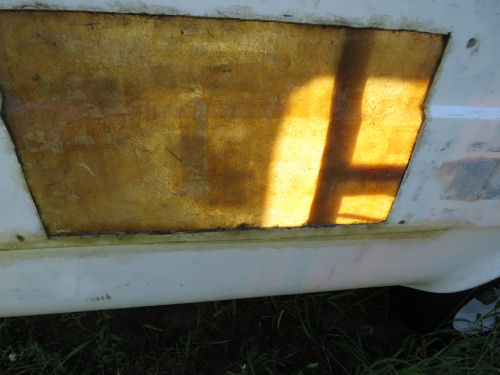
So, I slapped on some more fiberglass over that cut. I may not be able to make the exterior look perfect in that area, but that was unlikely anyway, given the big cutout. I'm almost ready to Bondo that, and then we'll know how smooth I can get it. I guarantee you it will look better than that big yellow square that's there now!
Hose time- No leak!!!!
#1- so numbered because it's the most serious. Now we move on to the back window. Well, sort of. Let's detour to #3. Every time I turned the hose on, I was also spraying the roof to get some water up there and find the vent leak. No leak.
The back window is an issue. For one thing, it doesn't fit the cutout in the frame very tightly. Also, the front and back windows are much bigger, so there is more possibility for torque to loose the seals. I loosened the screws and was about to take it out, but it really was in there quite firmly. I decided to see what I could do from the inside. Two of the framing pieces around the window cutout really needed to be replaced anyway. I had tried to fix the lower one with Git-Rot, but it honestly wasn't sufficient. In the same post linked about the Git-Rot, I also replaced one of the framing pieces on a side window. I had used Liquid Nails Heavy Duty to glue it to the fiberglass, but I was definitely not happy with those results.
I pulled off the top and bottom framing pieces, and used my oscillating saw to clean up the old messy adhesive. Picture is before the cleanup.

So I asked Gary what adhesive he would recommend- the product also had to be able to fill uneven places as well. And that's how I found out about the auto adhesive I showed you yesterday.
Back up a second. After I took the two boards off that needed to be replaced, I packed the excess space all around the window with more butyl.

This helped, but there was still a significant leak on the top edge. Well, I took a fat bead of that auto adhesive and smeared it all along the top of the window on the inside, bonding it to the fiberglass. It means that if that window has to come out in the future I may have troubles. But if I don't stop the leaking I've got worse troubles.
Let that dry, packed the butyl that is on the outside more firmly and tried some gentle water with the hose. No leak! Waited a while and tried some heavier pressured water with the hose. No leak! Waited a while and let the sprinkler rain on the back of the trailer for a half hour. No leak! Not even any dampness. Is it possible that I've conquered this thing?
Used more of that adhesive to glue the new window framing back in place. I had to get a little creative with the clamping, but I rigged something up.

So my ace in the hole is that if leaks develop on down the road (literally), I'll remove the bead of butyl on the outside edge of the window frame and use more of that windshield adhesive. I don't think I can get it to look very good, but at least it can be painted over.
Tried again to make the vent leak. Nothing. Maybe the wind of that storm was lifting the vent cover just enough to force some water in that way. I have a little of the auto adhesive left, and it doesn't keep. Maybe tomorrow I'll run the last of it around the vent anyway.
So... my reward is that I put down the floor ventilation pad. It was not as difficult to get it smooth as I thought it would be. Best thing I did was take off my sneakers. Sock feet did not catch on the rubbery finish.

And then put the vinyl back in. Still looks great! I have to make a couple of holes for wires (they are under where the lumps show), and think about any other issues with it, but I may be ready to start making forward progress.

There is no other news. It was hot and humid again, and I only worked on the trailer. But I feel like I really accomplished something.
 | See Drain Holes See Index to Fiberglass Trailer Refurbish |
2 comments:
You accomplished a lot. Good job on figuring all of that out
Sounds like progress!
Post a Comment